I have no slingshot.
Finish Chapter 2: binoculars to Mymble, then trade the fishing rod. The walkthrough covers that beat.

Moomin: Midsummer Madness Chapter 3: free Snorkmaiden, fake a storm for the Hattifattener, dive for the barometer, untangle the sun. November 2026.
Haunted theater, storm, barometer.
~5 min read
This Moomin: Midsummer Madness Chapter 3 page is only the haunted theater: lights, Snorkmaiden’s lock, the fake performance, the Hattifattener storm, the barometer dive, and the sun ropes. Bring the Chapter 2 slingshot. Verified November 15, 2026.
If you still need breakfast or binoculars, go back to the walkthrough.
| Beat | Need | Who |
|---|---|---|
| Enter | Matches, then rope | Either, then inside |
| Snorkmaiden | Seat key, striped box, symbol lock | Little My on the box |
| Performance | Fabric, boa, necklace, garlic chocolates | Both |
| Storm | Bird, newspaper, storm slots, weather game | Little My on weather |
| Barometer | Hatch dive, underwater fan | Swim |
| Sun | Fan lift, rafter fish click, knot order | Little My in rafters |
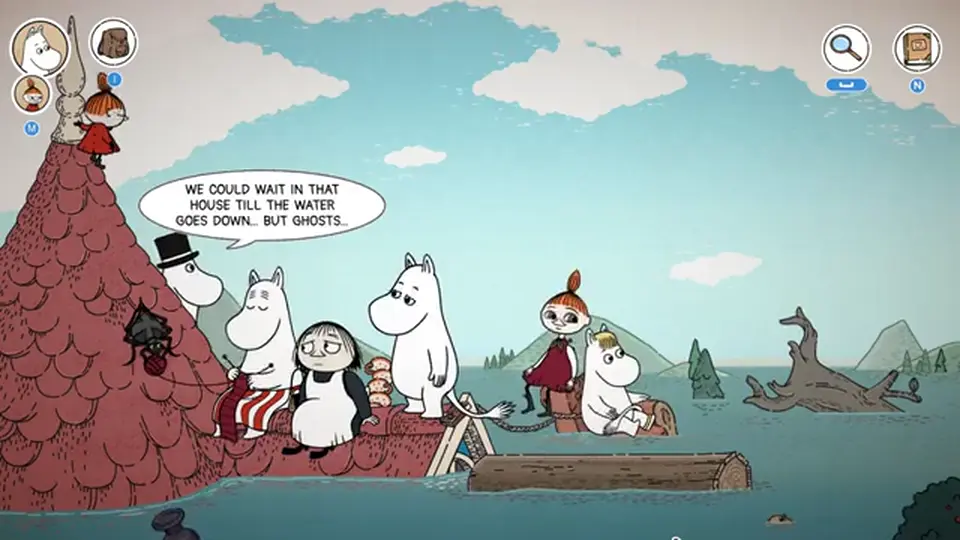
Cross on the floating log. Take matches on the starting side and use them at the dark door, then pull the interior rope for lights. Stage tub fabric is later costume. Little My climbs for the mechanical bird — keep it for weather. Backstage: feather boa, dressing room, key on the seat for Snorkmaiden’s door.
Use Little My on the striped red-and-beige magician box to cross. Talk to Misabel, take chocolates. The other lock is portrait symbols read in wig-display order. Moominmamma outside gives garlic; mix garlic into shoe polish then into the chocolates in the bag, not on the floor.
Slingshot the scenery machine. Pick the castle backdrop, then return to the stage — a chest appears with a necklace. Give Snorkmaiden necklace, boa, and fabric, then set the garlic chocolates in front of her. Switch to Little My and use the see-saw during the performance to catch the ghost. Take the captain’s hat to Moominpappa.
Check the stage after every scenery change. Searching only backstage is the usual miss.
Match each person in the portrait to a symbol, then tap those symbols in the order of the wigs on the stand. If a recap disagrees with your wig order, trust the stand in your save — displays can be walked around. Next: the storm.
Inspect the stage hatch near Pappa. Talk to Mymble outside and take the newspaper she discards. The Hattifattener hides behind the shell. Leave the center scenery on castle; set the other two to stormy weather. Use the mechanical bird on the knight armor for noise, then use the newspaper on the Hattifattener at the shell.
Weather minigame: move Little My to catch storm symbols (clouds, rain, thunder, whirlwinds) and avoid sunshine until the Hattifattener-shaped meter fills. This is the same family of board as other Skip-optional minigames; if Skip appears and you only want plot, you can leave — trophy hunters should play it. Recaps from launch week agree on bird + newspaper + storm slots as the trigger, not a new item from Chapter 1.
Matched by build plan, shared topics, and guide progression — not random related links.
When electricity is up, enter the floor hatch left of the stage and swim down for the barometer. Turn on the fan down here as well — later Little My rides that gust. Return the barometer to Pappa.
Set scenery to sunny weather. Little My jumps into the fan until she catches the hook; change scenery again to lift her. Recaps then use a fishing rod on the large fish to free her — Unverified if that still works after the Chapter 2 slingshot trade; try the click, then retry without the rod if the bag is empty. On the tangled sun, only pull knots that have no rope crossing above them. After each removal, re-scan which knot became free instead of clicking a fixed left-to-right order. Clearing the ropes ends Chapter 3.
Before you sail into Chapter 4, confirm five things. One: Snorkmaiden is free and dressed, otherwise later park talks assume she is with you. Two: Moominpappa has both the captain’s hat and the barometer; missing either usually means you skipped the see-saw ghost or the hatch fan. Three: the sun ropes are clear so the theater can become a sunny set in Chapter 5. Four: the slingshot from Mymble was used to start the scenery machine; do not expect a second Chapter 2 rod in the bag unless your build never consumed it (rafter-rod reuse is Unverified). Five: Cut the Corners wants a second ride on the magician box; do it now while the striped box is on this screen.
Launch-week recaps (text walkthroughs plus NeatPick’s 100% no-commentary upload tnk3T_LowCc) agree on storm slots + bird + newspaper as the Hattifattener key. They do not agree on every knot click. If your sun board looks different, follow the “no rope above” rule instead of a screenshot overlay. This Moomin: Midsummer Madness Chapter 3 note is also where Switch players should ignore foreign controller prompts in PC videos. Touch or the on-screen verb wins. If the scenery machine never opens, you are missing the slingshot from Mymble, not a hidden theater crank.
Next: dump leftover boards on minigames, then continue the walkthrough at Chapter 4.
Finish Chapter 2: binoculars to Mymble, then trade the fishing rod. The walkthrough covers that beat.
Newspaper from Mymble, bird on armor, storm slots, then the minigame. Order matters.
Floor door left of the stage, used after the storm electricity is available.
Matched by build plan, shared topics, and guide progression — not random related links.